
Encapsulation vs. a Vapor Barrier Alone
One is a sheet of plastic on the dirt. The other is a sealed system with drainage, insulation and a humidity target. Both are legitimate, they cost very different money, and the readings in your crawl space decide which one you are buying.
- Free written diagnosis within 48 hours
- Published per square foot pricing, no commissioned salespeople
- We will quote the smaller job when the smaller job is right
 Drainage systems: lifetime, fully transferable warranty
The short answer
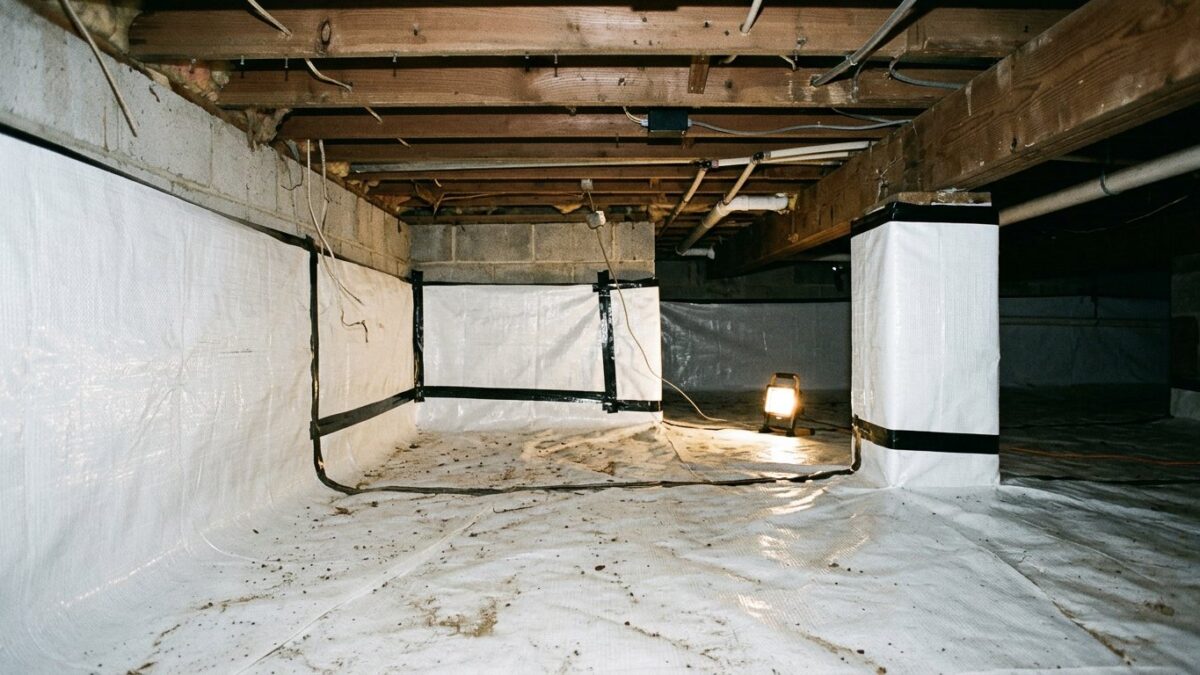
A vapor barrier is one layer of plastic laid over crawl space dirt to slow moisture rising out of the ground. Encapsulation is a complete system: a heavy reinforced liner sealed to the walls and piers, vents closed, drainage and a sump where water arrives, and a dehumidifier holding the humidity down.
The two get sold as the same idea at two price points, and they are not. A vapor barrier addresses one path: water vapor evaporating up out of the soil. It does nothing about the humid outdoor air coming through open vents, nothing about the moisture a masonry wall wicks in from wet ground, and nothing about liquid water arriving after a storm. Encapsulation closes all four paths at once and then measures the result. Whether you need the second one depends entirely on how many of those paths are open in your crawl space.
That question gets answered differently here than it would in a dry climate. Illinois clay stays saturated for days after rain, our summers push outdoor dew points high enough that vented air condenses on cool framing, and a large share of the crawl spaces we open across Will, Cook and Kane counties still have bare dirt under a torn builder sheet. On a genuinely dry crawl a good barrier is honest work and we will quote it. Where the ground stays wet, the full system exists for a reason: see the crawl space encapsulation overview for what it includes.
What does a vapor barrier alone actually do?
A vapor barrier is a sheet laid on the dirt to slow water vapor leaving the ground. That is the entire job description, and in a dry crawl space it is frequently enough.
Here is how one goes in, and the point at which it stops working.
-
Clear and rake the ground
Debris, old insulation and anything sharp comes out, and the dirt gets raked reasonably flat. A rock or a nail head left under the sheet becomes a hole the first time somebody crawls across it to run a cable.
-
Roll the sheet out
Plastic is rolled across the floor and cut around the piers, with the runs overlapped where they meet. Builder-grade material is thin enough that it tears under a knee, which is why most of the originals we find are already open in several places.
-
Seam it, or do not
A careful installer tapes the seams and runs the sheet a few inches up the wall. Most of what we find is laid loose and held down with bricks, which means the soil is still breathing freely around every edge and pier.
-
Leave the vents alone
A barrier by itself is normally installed under vented crawl space assumptions, so the foundation vents stay open and outdoor air keeps cycling through. In an Illinois July that air arrives carrying more moisture than the ground was giving up.
-
Come back in a few years
The failure is undramatic. Corners fold back, tears open at the piers, a section gets dragged aside by whoever ran the new duct. The plastic is still down there and it has stopped being a barrier.
When a barrier alone is the right call
- A crawl space that already measures dry through a humid July
- No standing water now and no history of it
- A short hold on the house, where the honest minimum is the goal
- An outbuilding or a rental nobody is breathing in daily
What it cannot do
- Nothing about the humidity already in the air down there
- Nothing about outdoor air arriving through open vents
- Nothing about liquid water that actually enters the crawl
- Loose sheeting migrates, folds and tears within a few seasons
What does full encapsulation add on top of that?
Encapsulation treats the crawl space as part of the house rather than as outdoors with a floor over it. The liner is one component out of five, and on its own it is the least important of them.
This is what the other four components are, in the order they get built.
-
Water before plastic
If the ground takes on water at all, that gets drained before anything is covered: a stone-bedded line around the inside perimeter feeding a sealed pit with a pump in it. Cover wet dirt without draining it and you have built a pond with a lid.
-
A heavier liner, attached to the building
The floor liner is reinforced rather than thin poly, it runs up the foundation walls, it is mechanically fastened near the top and sealed around every pier, and the seams are taped. It is fixed to the structure instead of resting on the dirt.
-
Vents sealed, hatch gasketed
Foundation vents get closed and insulated and the access hatch gets a gasket, which stops the summer air exchange that a vented crawl depends on. This step is also the one that ends the January draft under the floor.
-
Walls and rim insulated
Rigid insulation on the foundation walls and at the rim joist brings the crawl space inside the thermal envelope. The framing stops running cold enough for moisture to condense on it, and the pipes down there stop being outdoor pipes.
-
Humidity controlled and readable
A dedicated dehumidifier draining to the sump holds the air dry once the sources are closed. We leave a hygrometer behind so you can check the number yourself instead of taking our word that the system is working.
What the extra layers buy
- A humidity number you can hold through an Illinois August
- Framing, ductwork and stored belongings that stay dry
- Insulation that keeps its value instead of sagging out wet
- Far less freeze risk on the pipes running through the space
- A lifetime, fully transferable warranty on the drainage system
What it asks of you
- A dedicated circuit and standing power for the dehumidifier
- A filter check and a sump test once a year, like any system
- Real cost: this is a five-figure job on most crawl spaces
- Combustion air confirmed by an HVAC contractor before vents close
Do I need encapsulation, or is a vapor barrier enough?
The deciding factor is not the size of the crawl space or the age of the house. It is how many moisture paths are open, and a meter answers that faster than an opinion does.
| Vapor barrier alone | Full encapsulation | |
|---|---|---|
| What gets covered | The dirt floor only | Floor, foundation walls, piers and the rim |
| Material | Thin builder poly, usually laid loose | Heavy reinforced liner, fastened and taped |
| Foundation vents | Left open | Sealed, with the space brought inside the envelope |
| Water that actually enters | Not addressed at all | Perimeter drainage to a sump with a pump |
| Air humidity | Unmanaged, whatever the weather gives you | Held down by a dedicated dehumidifier |
| Effect on the smell upstairs | Some improvement, rarely all of it | The source itself is removed |
| Realistic service life | A few seasons before it needs attention | Built and warranted as a permanent system |
| Published cost | A small fraction of a full system | $7 to $14 per square foot |
| Our warranty | Not a system we warrant on its own | A lifetime, fully transferable warranty on the drainage |
Material matters more than most homeowners expect, because the gap between builder poly and a reinforced liner is the gap between a few seasons and a few decades. Thicknesses and materials are broken down on the vapor barrier page.
Want to know which one your crawl needs? We measure humidity, check the ground and the walls, and quote the smaller job when it is the right one, free within 48 hours.
Which does your house need?
Wall construction and ground condition decide this more than square footage does, and both track closely with when the house was built. The four below account for nearly every crawl space we get called to, from Cook County out to Lee.

Pre-war bungalows and two-flats
Shallow dirt crawls under rear additions, walled in rubble stone or early block that wicks moisture straight through. A sheet on the floor does nothing about the walls, and in these spaces the walls are half the problem.
Encapsulation, walls included
Post-war block ranches
Low crawls on wet clay with vents every few blocks and a damp corner wherever a downspout dumps. If the ground takes on water at all, drainage goes in before anything gets covered over.
Drainage first, then seal
1980s and 90s poured wall homes
Poured walls that leak far less, an original builder sheet already sagging on the ground, and wet batts falling out of the joist bays. The honest answer here is often a proper liner and rim work rather than the whole package.
Depends on the readings
Newer subdivision homes
A code-minimum barrier laid at construction, dry ground, grading that still falls the right way. These are the crawls where a better sheet, sealed properly at the seams and the piers, genuinely can be enough.
A barrier may be plentyWhat does each one cost?
We publish encapsulation at $7 to $14 per square foot, so multiply your own crawl space out: 1,000 square feet lands between $7,000 and $14,000, and wall height, access and drainage decide where in that band a house falls.
| Work | Range | What moves the number |
|---|---|---|
| Crawl space encapsulationper square foot | $7–$14 | Access height, standing water, whether drainage goes in first |
| Interior drain tileper linear foot | $95–$160 | Length of the run, slab thickness, what has to be moved off the walls |
| Sump pump with battery backupinstalled | $2,800–$4,500 | Pit condition, backup capacity, discharge routing |
| Downspout extensions and regradingtypical job | $600–$2,500 | Feet of grade to rebuild, soil hauling |
A vapor barrier on its own is a fraction of that number and we are happy to quote it as a standalone job when the readings support it, because selling a system to a dry crawl space is how a company loses the next referral. All published ranges live on the pricing page.
When a vapor barrier alone is the honest answer
A fair number of the crawl spaces we are called to do not need encapsulating, and a few do not need us at all. Here is how to tell before you spend anything.
Your crawl space already reads dry
Put a $30 hygrometer down there and leave it from June through August. If the humidity sits comfortably low through the worst weeks of an Illinois summer, the ground is not giving up much and a well-installed barrier is all the insurance you need.
Measure before you buyYou are selling within the year
A clean, properly laid barrier is defensible on a disclosure and it reads well to a buyer's inspector. Spending five figures on a system you will hand over in eight months rarely comes back at closing. What is worth doing before a sale lays out the trade.
Timing questionThere is standing water down there right now
Then neither option is next. Water on the ground has to be drained and its source found before any plastic goes down, or you have built a swimming pool liner. Standing water gets handled first, every time.
Drainage firstThe water is arriving off your roof
One downspout emptying beside the wall, or ground that has slumped until it tips back at the house, can put hundreds of gallons next to the crawl space in a single storm. That is $600 to $2,500 of outside work, and it earns a full season of watching before anybody talks to you about liners.
Cheapest real fixQuestions homeowners ask about barriers and encapsulation
Is encapsulation just an expensive vapor barrier?
No, though plenty of quotes blur the two on purpose. The liner is the visible part and the least important one. What you are buying with encapsulation is the drainage under it, the sealed vents, the insulated walls and rim, and a dehumidifier holding a humidity target you can read on a meter. Strip those four away and you have paid system money for a sheet of plastic, which is worth complaining about.
Can I install a vapor barrier myself?
Many homeowners do, and in a dry crawl space with decent headroom it is a reasonable weekend. Clear everything sharp, rake the dirt flat, overlap and tape the seams generously, and run the sheet up the walls rather than stopping at the dirt line. What sends people back down there a year later is loose material, untaped seams and nothing sealed around the piers. Buy heavier plastic than the roll that looks adequate.
Will a vapor barrier get rid of the musty smell upstairs?
It usually helps and it rarely finishes the job. Covering the dirt cuts the largest moisture source, so the odor generally drops. But the air already in that space stays humid, the vents keep bringing more in through the summer, and any mold growing on damp joists keeps producing smell until the wood dries out. If the smell is the reason you are reading this, the humidity has to be actively controlled, not just slowed.
Does encapsulation require closing the foundation vents?
Yes, that is central to how it works, and it has to be done in the right order. Sealing vents on a crawl space that still has wet ground and no dehumidifier traps moisture rather than removing it. And if a furnace or water heater sits down there, its combustion air has to be confirmed by an HVAC contractor before anything closes. Done in sequence it is safe. Done backward it makes the space worse.
How long does each one last?
Thin poly laid loose on dirt usually needs attention within a handful of years, because it folds back at the corners, tears at the piers and gets dragged aside by anyone working down there. A reinforced liner fastened to the walls and sealed around penetrations is built to stay put for decades. The moving parts, meaning the pump and the dehumidifier, are the components with a service life, and both are replaceable without disturbing the liner.
Can I start with a barrier and encapsulate later?
You can, and it is a sensible sequence when money is the constraint, with one caveat worth knowing up front. The barrier itself is not salvageable when the full system goes in; the liner, the wall attachment and the sealing all get done again with heavier material. So treat the barrier as a few years of protection you are buying, not as a deposit toward the bigger job. We will tell you which one your readings justify.
What is actually in a full encapsulation scope?
Two quotes using the same word can describe genuinely different work, which is why the line items matter more than the headline number. Liner weight, how far up the wall it runs, whether the walls and rim get insulated, whether a dehumidifier and a sump are included, and who handles the vents are the places quotes quietly diverge. Read them side by side.
See the full scope, line by line

Let the meter decide, not the brochure
Free written diagnosis within 48 hours, published per square foot pricing, and 20+ of Illinois crawl spaces behind the recommendation.
Or talk to a human right now
(630) 335-1128
Request your free estimate
Tell us what you're seeing. We'll call back fast and be out within 48 hours.