
Basement Wall Vapor Barriers and Wall Systems
Plastic on a basement wall does exactly one job, and stopping water is not it. Put the layer on the wrong face and the sheet meant to protect your framing becomes the thing holding moisture against it.
- Free written wall diagnosis within 48 hours
- Published pricing on every drainage line item
- 20+ in Chicago basements, 1,500+ homes
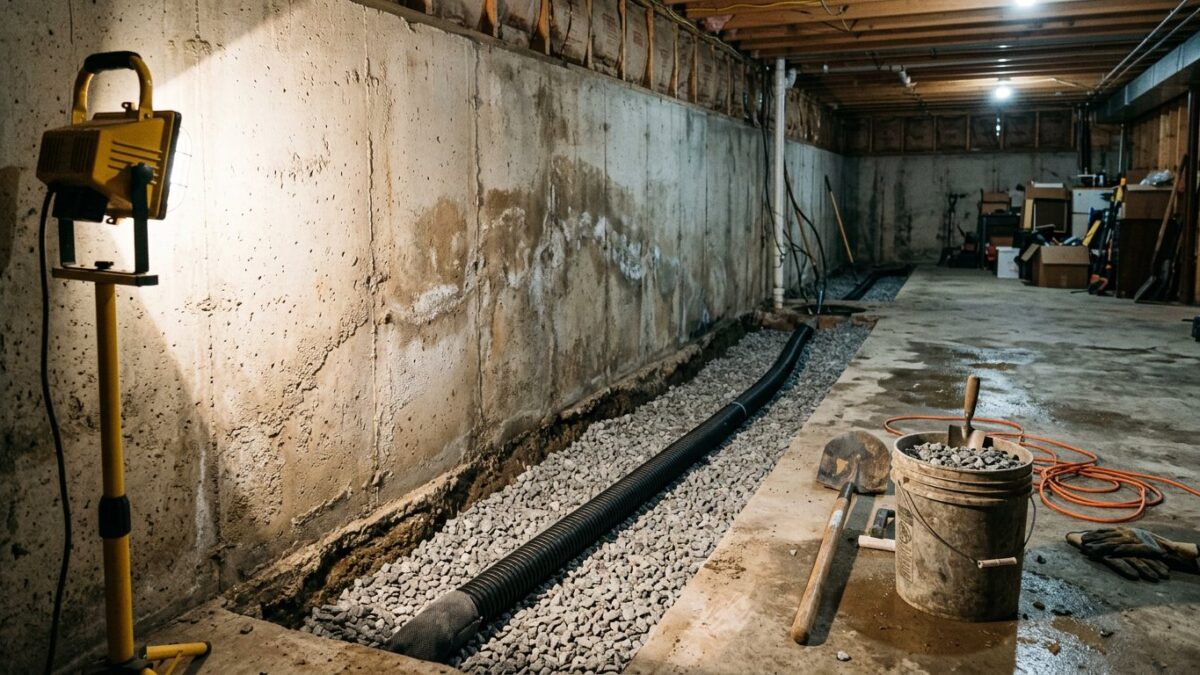 Drainage first, then the wall: lifetime, fully transferable warranty
The short answer
A basement wall vapor barrier blocks moisture vapor moving out of damp soil and concrete into finished framing. It belongs tight against the foundation face, outside the insulation, never on the warm room side where it gives vapor a cold surface to condense on. It handles gas only, so liquid water still needs drainage first.
Concrete and block are not waterproof and were never asked to be. Both are porous enough that moisture in the surrounding soil moves through them constantly in gas form, pulled toward the warmer, drier air inside the house. That movement never stops while the soil stays damp. A vapor barrier is a layer placed in the wall assembly to interrupt it, so the moisture ends up on the concrete side of the material rather than inside your insulation, your studs and your drywall.
This region makes the job harder than most. Glacial clay holds water against a foundation for days after a storm, so the soil face of the wall is rarely dry, and the winter temperature difference across a below-grade wall is large enough to push a lot of vapor inward. Build the layer on the wrong face here and you have created a cold surface with damp air on both sides of it. If you have not chosen a drainage system yet, the basement waterproofing overview covers what we install and why.
What does a vapor barrier on a basement wall actually do?
A vapor barrier stops moisture travelling as gas. Damp soil keeps a steady supply of it moving through masonry into the room, whether or not the wall ever leaks.
Follow one gram of moisture from the clay outside to your finished wall and the job of each layer becomes obvious.
-
Damp soil keeps the supply going
Clay backfill beside a Chicago foundation stays wet long after the rain stops. That saturated ground is the reservoir, and nothing you build inside the room changes it. It is why below-grade walls behave nothing like the framed walls above them.
-
Masonry wicks it inward
Poured concrete and block both draw moisture through their pores and mortar joints. The wall does not have to leak for this to happen. A hand laid on dry-looking block in March usually comes away cool and faintly damp.
-
Warm room air pulls harder
Vapor moves toward the warmer, drier side, which in a heated basement is yours. That pressure runs all winter, and it is why a stud bay that looked fine in October smells sour by February with no visible water anywhere.
-
The barrier interrupts the crossing
A sealed sheet or a board of rigid foam held tight to the foundation stops the vapor at the concrete face. Moisture stays on the soil side of the layer, where it can dry back outward, instead of collecting inside insulation and framing.
-
The room still needs a way to dry
A barrier redirects moisture, it never removes any. The air in the room still needs a dehumidifier or a conditioned supply, or you have simply changed where the dampness decides to show up.
Where it earns its keep
- Basements being framed for drywall, flooring and trim
- Block walls, which wick considerably more than poured concrete
- Rooms heated all winter, where vapor drive is strongest
- Walls already drained at the footing and proven through a storm
- Crawl spaces, where the same principle becomes encapsulation
What it will not do
- It stops vapor, never liquid water or pressure at the footing
- A seeping crack behind plastic still seeps, just out of sight
- It cannot dry air that is already carrying too much moisture
Why do finished basement walls fail in Chicago?
Most failed basement walls we open were built in a dry month, sealed the wrong way round, and given no path for moisture to leave.
These are the five assembly mistakes we find behind soft drywall, roughly in order of how much damage they cause.
-
Poly stapled on the warm side
A sheet over the face of the studs is standard practice above grade and wrong below it. Vapor coming through the concrete reaches it from behind, condenses on the cold plastic and has nowhere left to go but the framing.
-
Fiberglass pressed to concrete
Batts do not stop vapor and they hold whatever water reaches them. Against a below-grade wall they stay damp for months, lose most of their rated value and feed every organic material sharing the bay with them.
-
Bottom plate flat on the slab
Bare lumber sitting on concrete wicks moisture straight up out of the slab. That is where rot in finished basements begins, and it stays hidden behind base trim until the smell arrives a year or two later.
-
Drywall run to the floor
Paper facing touching the slab edge behaves like a wick. An inch of clearance at the bottom, covered by trim, is the difference between drying out after a small event and replacing four feet of wall.
-
Framing before drainage
The expensive one. Finishing over a wall that still takes water means the next real storm comes through the whole assembly, and the drainage you postponed now arrives with a demolition bill in front of it.
What holds up down here
- Rigid foam board sealed tight to the foundation face
- A capillary break under any bottom plate
- Treated lumber wherever wood meets concrete
- Drywall held off the slab and covered by base trim
- Drainage and a pump finished before a stud goes up
Signs it already failed
- A musty smell that returns every spring
- Base trim cupped or stained along one wall
- Drywall soft to a knuckle in the bottom few inches
- Rusted carpet tack strip or lifting plank at the wall
Which wall assembly belongs on a Chicago basement wall?
Two assemblies get built in this region, and they behave nothing alike after the first humid summer. Line them up against what actually happens below grade.
| Rigid foam sealed to the wall | Poly sheet over fiberglass batts | |
|---|---|---|
| Where the moisture stops | At the concrete face, outside the insulation | Inside the stud bay, on cold plastic |
| What happens in January | The face stays near room temperature | The sheet stays cold and collects condensation |
| If the wall takes liquid water | It shows at the floor where you can see it | It hides behind the sheet until it smells |
| Insulation value held | Holds its rating because it stays dry | Falls as the batt takes on moisture |
| Mold food in the assembly | Little: foam, steel or treated lumber | Paper facing, batts and untreated framing |
| Material cost | Higher per square foot up front | The cheapest option in the aisle |
| After a small water event | Dried, inspected and repaired locally | Usually a gut of that entire wall |
| What it still requires | Footing drainage and a working pump | The same drainage, plus a lot of luck |
No wall assembly substitutes for drainage. If water still arrives at the joint where the floor meets the wall after a storm, that gets solved before anything is framed: see interior drain tile.
Planning to finish the basement this year? We diagnose and price the drainage first, in writing and free within 48 hours, so the wall you build stays dry.
What does your house need behind the drywall?
The era a house was built in decides how much moisture the wall moves and what the finished assembly has to survive. These four cover most of what we see across the seven counties.

Pre-war bungalows and two-flats
Stone and early concrete walls that pass moisture all year, usually with original clay tile long since silted shut. Any assembly here has to assume a permanently damp face, which rules out plastic stapled across the studs.
Drain first, foam second
Post-war block ranches
Block wicks through every mortar joint and the hollow cores hold standing water. White crusting on the wall is the proof, and it means moisture is arriving as liquid rather than only as vapor.
Weep holes before framing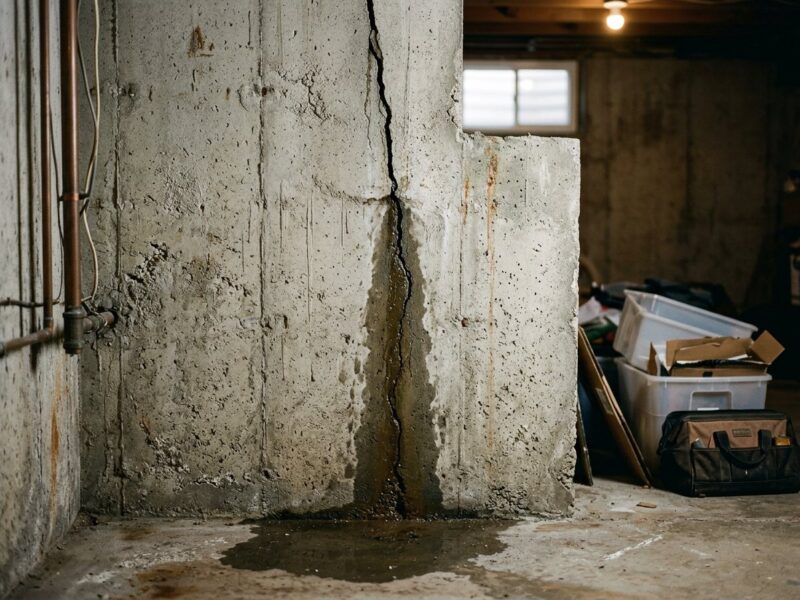
1980s and 90s poured walls
Denser walls that wick far less, but almost always one shrinkage crack weeping during spring storms. Frame over it and the only evidence will be a stain spreading under the carpet.
Inject, then finish
Newer subdivision homes
Perimeter drainage and a builder-grade pump already in place, so the wall itself is often the drier half of the problem. Grading that has settled back toward the house is the usual culprit.
Check grading, then insulateWhat has to be paid for before the wall goes up?
Drainage is the line item that decides whether a finished wall survives. A full perimeter interior system on an average Chicago basement runs $8,000 to $16,000, and interior drain tile is published at $95 to $160 per linear foot.
| Work | Range | What moves the number |
|---|---|---|
| Interior drain tileper linear foot | $95–$160 | Length of the run, slab thickness, what has to be moved off the walls |
| Sump pump with battery backupinstalled | $2,800–$4,500 | Pit condition, backup capacity, discharge routing |
| Crawl space encapsulationper square foot | $7–$14 | Access height, standing water, whether drainage goes in first |
Framing, foam and drywall are carpentry rather than waterproofing, so we quote only the drainage and sealing scope and do not mark up anyone else's trade. Every range above is published on the pricing page.
When you do not need any of this
A fair number of the walls we are asked to look at need an insulation plan and nothing else. Saying so is the whole reason this page exists.
The wall is dry and you are only insulating
Some basements really are dry: no stains, no white crusting, no smell after a wet spring. Those walls need an air seal and a sensible foam detail, not a waterproofing contractor. Watch one full season before deciding.
No system neededIt is the air, not the wall
Damp air, sweating pipes and a sour smell in July usually means humidity rather than seepage. A thirty dollar hygrometer and a dehumidifier settle it for a rounding error against any construction cost. Start on the humidity page.
Costs almost nothingOne crack is doing all of it
A single weeping crack in a poured wall is a $450 to $900 injection carrying a 10-year warranty. Sealing that and finishing the room beats buying a perimeter system the house does not need. The crack decision is here.
Usually injectionThe water is coming off the roof
Downspouts dumping at a corner deliver more water to one spot than most seepage problems ever manage. Extensions and regrading run $600 to $2,500. Fix that first and watch it through a season.
Cheapest real fixQuestions homeowners ask about basement wall vapor barriers
Should I put plastic on my basement walls?
Only against the concrete, never on the room side of insulation. Below grade the moisture is travelling inward from the soil, so a sheet facing the room hands that vapor a cold surface to condense on inside the stud bay. Rigid foam sealed directly to the foundation does the same job and stays warm enough to avoid the problem. If the wall still takes liquid water, neither version is ready to be covered.
What thickness of vapor barrier do basement walls need?
Placement and continuity matter far more than thickness. What controls vapor is an unbroken layer with sealed seams and edges, so taped rigid foam and a properly lapped sheet both work while a torn sheet with open seams does very little. Crawl space liners are a different question, because that material gets walked on and needs real puncture resistance. The wall version only has to stay intact and sealed.
Can a vapor barrier stop a leaking basement wall?
No, and it will hide the leak while it fails. Liquid water arriving under pressure at the floor joint or through a crack does not care what is stapled in front of it. It runs behind the layer, collects at the bottom plate and reappears months later as a smell or a soft patch of drywall. Drainage stops liquid water. A barrier only manages the vapor crossing the masonry.
Do I still need a dehumidifier if I install a vapor barrier?
Usually yes. The barrier stops moisture crossing the wall and does nothing about moisture already in the room air, and a finished basement in a Chicago July will sit above sixty percent relative humidity without any help from the foundation. A hygrometer costs about thirty dollars and answers it in a day. Most finished basements down here run best with a dehumidifier or a conditioned air supply.
What insulation works on a Chicago basement wall?
Anything that does not absorb water and can sit tight against concrete. Rigid foam sealed to the wall is the common answer because it handles insulation and vapor control in a single layer. Fiberglass batts pressed against a below-grade wall are the assembly we open up most often to find wet, matted and useless. If batts are used at all they belong in a framed bay held clear of the foundation face.
Does waterproofing have to come before framing?
Every time. Drainage and crack repair are cheap while the wall is open and expensive once there is finished space standing in front of it. That order also means the interior system carries a lifetime, fully transferable warranty before anyone spends a dollar on drywall. The other order means paying for the same materials twice. Read the sequence on our <a href="/our-process/">process page</a> before you book a carpenter.
Is your basement damp, or actually wet?
Those are different problems with very different bills attached. Air fogging the windows in July is a humidity question. Water tracking across the floor the morning after a storm is a drainage question, and the wall assembly you should build depends entirely on which one you have. The humidity page walks through tests you can run yourself this week.
Read about basement humidity

Build the wall once, on a basement that is already dry
Free written diagnosis within 48 hours, published drainage pricing, and 0% for 12 months financing when the finishing project is already booked.
Or talk to a human right now
(630) 335-1128
Request your free estimate
Tell us what you're seeing. We'll call back fast and be out within 48 hours.