
Cove Joint Leaks and How They Get Sealed
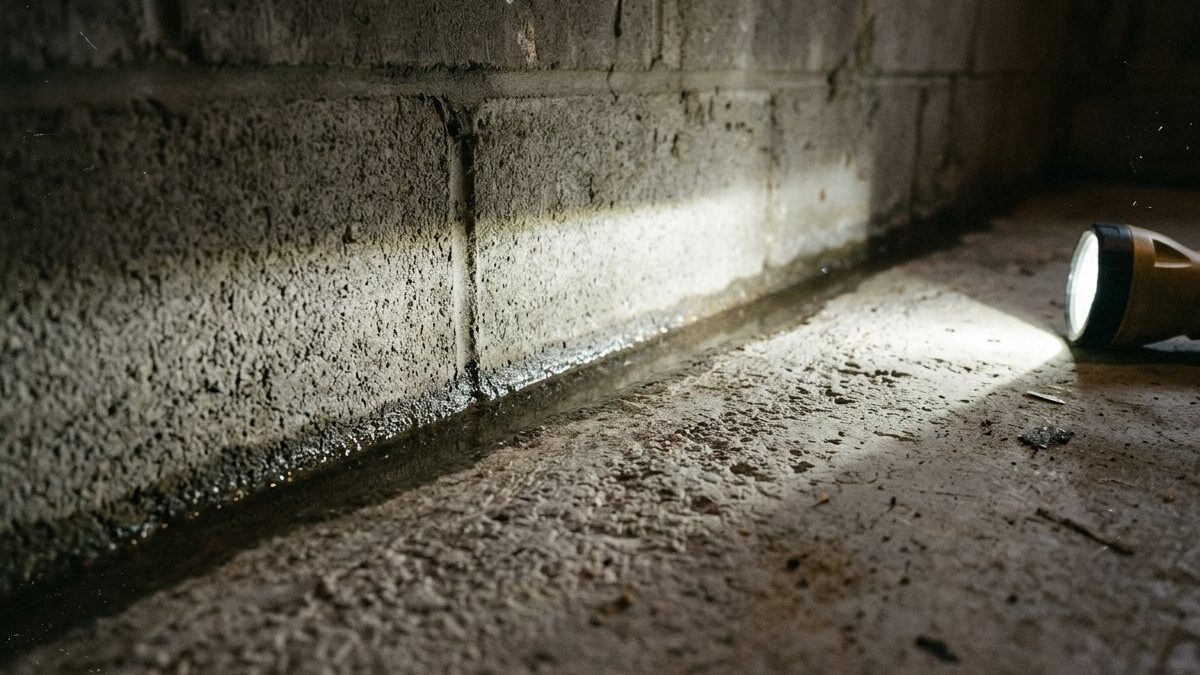
The seam where your floor meets your wall was never sealed. It is a gap left by the way basements get built, and the only repairs that hold are the ones that stop fighting the water pressure behind it.
- Free written diagnosis within 48 hours
- 1,500+ Chicago area homes served
- Published pricing, no commissioned salespeople
 Repaired under a lifetime, fully transferable warranty
The short answer
A leaking cove joint is repaired by draining the water rather than sealing the gap. A channel is opened at the slab edge, perforated pipe in washed stone is laid beside the footing, block cores are relieved through weep holes, and the joint is left to drain into that pipe. Surface patches fail because pressure has nowhere else to go.
The cove joint exists because a basement gets poured in stages. The footing goes in first and cures. The wall is built on top of it days or weeks later, so the two never chemically bond. Then the slab is poured against the wall and shrinks as it cures, opening a hairline seam all the way around the room. Nobody did anything wrong. Every basement in the region has that seam, and it sits at the exact elevation where water collecting beside the footing finds its lowest opening into the house.
What makes it a Chicago problem is what the soil does above it. Dense clay sheds very little water downward, so a heavy storm saturates the loose backfill against the wall and builds pressure at the base of the foundation faster than the ground can absorb it. That pressure needs an exit, and the cove is the closest one. If you want the wider system view before deciding on a repair, the basement waterproofing hub covers how the pieces fit together.
How do you actually stop a cove joint from leaking?
The repair that lasts does not close the joint. It gives the water beneath your slab a lower and easier route out, so nothing arrives at the seam with any force behind it.
This is the sequence on a typical Chicago basement, and where the cove specifically gets addressed.
-
Confirm the cove is the entry point
Water on a floor spreads, so the wet spot is rarely the source. We dry the perimeter, watch during a hose test or a storm and look for the first bead at the seam. Water arriving from a floor crack or a wall crack is a different repair entirely.
-
Open the slab at the seam
Concrete comes out in a band along the wall, down past the top of the footing. Cutting only a shallow notch at the cove is the mistake that turns this into a two-year fix, because the water table sitting under the slab never gets touched.
-
Relieve the wall before the floor
On block, weep holes into the bottom course let the water standing inside the cores fall into the new channel. A block wall holding water in its cells will keep feeding the cove no matter what you do to the floor, and this is the step cheap jobs skip.
-
Drain the joint, do not plug it
Perforated pipe goes in washed stone under filter fabric, pitched toward the pit. The cove itself is left open to that stone bed. Anything reaching the seam falls straight into the drainage layer instead of climbing over the slab edge.
-
Capture the wall face and close up
A liner behind the wall carries any water running down the block down into the channel, then fresh concrete goes back over the top. From that day the seam is a drain inlet rather than a leak, which is the whole idea.
Why this holds
- Water is relieved below the slab, so pressure never reaches the seam
- Block cores drain instead of storing water between storms
- The repair is reachable from inside for service later
- Nothing depends on a bond between old concrete and new patching
- Backed by our lifetime, fully transferable warranty
What it costs you
- Flooring and base trim come off along the treated walls
- Two or three loud days, and a visible concrete band afterward
- A pump to maintain and test twice a year
Why does hydraulic cement keep failing at the cove?
Every product sold for this problem works by blocking the opening. None of them removes the pressure pushing on it, which is why the same seam is wet again a season later.
These are the five approaches homeowners try, roughly in the order they try them.
-
Hydraulic cement troweled into the seam
It sets fast, even underwater, and it genuinely stops the drip that afternoon. Then the pressure behind it finds the next weak point along the joint, or lifts the patch off the slab edge where nothing was ever keyed into sound concrete.
-
A urethane or polyurethane bead
Caulking the seam is flexible, which sounds like the answer to a moving joint. It still relies on adhesion to damp concrete and it still has hydrostatic pressure on the back of it. On a wall that runs during storms it usually peels within a season or two.
-
Waterproofing paint on the wall and cove
Coatings are rated for damp, not for pressure. Applied over block they can trap water inside the cores, and once they blister they take a layer of the surface with them. What they reliably do is hide the evidence at the exact spot you need to be reading.
-
A cove bead of new concrete
Building a fillet of mortar along the joint moves the seam rather than closing it, because the new material has the same cold joint problem against the old slab. It also makes the original seam harder to inspect the next time the floor goes wet.
-
Sealing from the outside without drainage
Coating the exterior of the wall without a footing drain leaves the membrane standing in water at the one elevation it is under most pressure. Water still reaches the footing, and the cove is still the lowest opening in the assembly.
Where a patch is fine
- A dry cove with a cosmetic gap, before finishing the room
- A short-term stopgap while an inspection is being scheduled
- A small void left by chipped concrete, not by seepage
Where it will not hold
- Any seam that runs during a heavy storm
- Block walls with water audibly moving inside the cores
- Seepage on more than one wall at the same elevation
- A cove that has already been patched once and returned
Seal it or drain it?
These are the only two strategies for a cove joint, and the choice is really a question about whether water is under pressure or simply present.
| Drain it with interior tile | Seal it with a surface patch | |
|---|---|---|
| What it does | Removes the water and the pressure below the slab | Blocks the opening and leaves the pressure in place |
| Published cost | $95 to $160 per linear foot of treated wall | A weekend and a bag of material |
| Holds under storm pressure | Yes, that is what it is designed for | Rarely past the first heavy season |
| Handles block cores | Yes, through weep holes into the drain | No, the cores keep filling behind it |
| Mess and disruption | Two or three days, flooring off along the run | None, done in an afternoon |
| What happens next time it fails | Serviceable from inside without demolition | The seam has to be chipped back out and redone |
| Effect on selling the house | A documented system with a transferable warranty | A patched cove a buyer's inspector will flag |
| Our warranty | A lifetime, fully transferable warranty on the system | Not warrantable as a repair |
One honest exception. If the cove only weeps after a specific downspout overflows, fix the water outside first and give it a season. Downspout extensions have retired more of these leaks than any patching product ever has.
Water at the floor-to-wall seam after every storm? We find the entry point, put the diagnosis in writing and quote from published ranges, free within 48 hours.
How the cove behaves in your house
The seam is universal. What differs is how much water gets to it and where that water was stored beforehand, and that follows the construction era.

Pre-war bungalows and two-flats
Stone or early block on shallow footings, with original clay tile that stopped draining generations ago. The cove here often runs steadily rather than seeping, because nothing outside is intercepting water anymore.
Full drainage, usually
Post-war block ranches
The textbook cove leak. Hollow cores fill during a storm and release slowly for days, which is why these basements smell damp long after the rain stops even when the floor looks dry.
Weep holes are the fix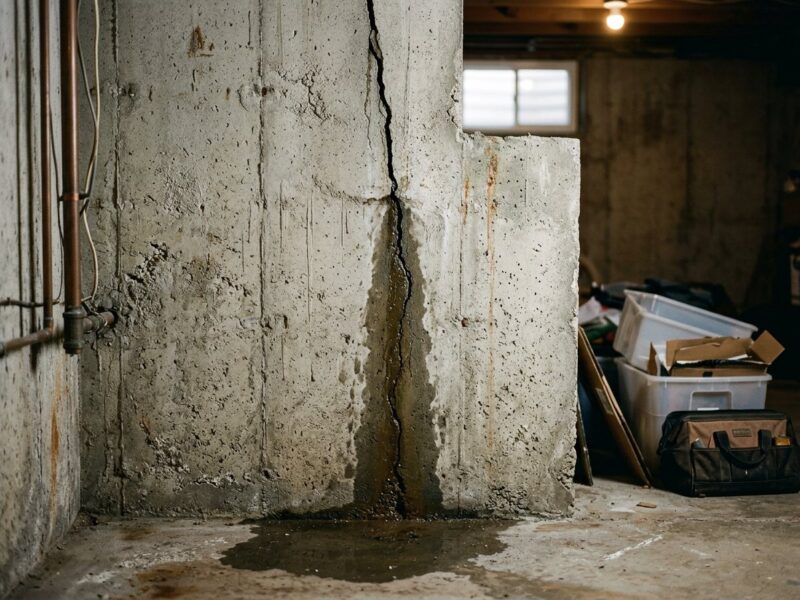
1980s and 90s poured walls
Solid walls that more often leak at a shrinkage crack than at the cove. If the water is genuinely tracking along the seam, check the grade and the window wells before assuming the footing is the source.
Verify the entry point
Newer subdivision homes
Footing drainage exists but may be silted or tied to a pump that cannot keep up. Cove seepage here is usually a symptom of a drainage system falling behind rather than of no system at all.
Check the pit firstWhat does cove joint repair cost?
Cove repair is priced as interior drain tile along the affected walls at $95 to $160 per linear foot, which puts a single wall in the low thousands and a full perimeter system between $8,000 and $16,000.
| Work | Range | What moves the number |
|---|---|---|
| Interior drain tileper linear foot | $95–$160 | Length of the run, slab thickness, what has to be moved off the walls |
| Sump pump with battery backupinstalled | $2,800–$4,500 | Pit condition, backup capacity, discharge routing |
| Downspout extensions and regradingtypical job | $600–$2,500 | Feet of grade to rebuild, soil hauling |
Most cove jobs need a pit and pump as well, since the pipe has to discharge somewhere, and a fair number need the outside water dealt with too. We quote the pieces separately so you can see what each one is buying. Full ranges are on the pricing page.
When the cove is not really the problem
Water spreads across a flat floor and collects at the wall, which makes the cove look guilty far more often than it is. Four things worth ruling out first.
It is coming up through the slab
Water surfacing at a floor crack in the middle of the room and running to the wall reads as a cove leak by the time you see it. Dry the floor and watch where the first bead appears. Water through the slab is a different diagnosis.
Watch, do not guessIt is condensation on cold block
A cool wall in humid July weather sweats, and the moisture runs down to the seam and pools there. Tape a foil square to the block for two days. Wet on the room side means humidity, and a dehumidifier is the first move. Reading basement humidity.
Costs nothing to checkIt is the floor drain, not the seam
Water rising during heavy storms and spreading outward from a drain is sewer backup, not seepage, and no drainage system at your footing will address it. That is a licensed plumber and possibly a backflow device. Telling them apart.
Not our workIt only happens in a downpour
A cove that stays dry all spring and runs once a year during a cloudburst is usually a capacity problem outside, not a foundation problem. Gutters, extensions and grade at $600 to $2,500 fix more of these than any basement work. Why heavy rain is different.
Start outsideQuestions homeowners ask about cove joint leaks
Is a leaking cove joint a structural problem?
Usually not on its own. The seam is a construction joint, not a crack, and water arriving there says the drainage is overwhelmed rather than the wall is failing. What does matter is what shows up alongside it. A bowing wall, stair-step cracking in block or doors that have started sticking turn this into a structural conversation, and those get assessed on their own terms.
Can I just seal the cove joint myself?
You can, and on a seam that is dry or only damp it may hold indefinitely. On a seam that runs during storms it is a stopgap, because nothing you apply from inside can resist water pressure pushing against the back of it. If you try it, note the date. A patch that fails within one wet season tells you clearly that pressure, not a gap, is the actual problem.
Do I have to treat the whole perimeter?
Only the walls that are genuinely wet, plus a margin past each end so water cannot simply surface beyond the run. Plenty of houses need one or two walls. What we will not do is quote a single wall when the cove is damp on three sides, because the water will keep using whichever run was left alone and you will have paid for half a solution.
How long does the repair take?
One to three days for most Chicago basements. Demolition and hauling out concrete happen first and are by far the loudest part. Pipe, stone, fabric, weep holes and the pit follow, then fresh concrete goes back over the channel. You get the day count in the written quote, along with what needs to be cleared out of the way before the crew arrives.
Will the repair get rid of the musty smell?
Usually, though not always immediately. The smell comes from moisture that has been feeding the room for years, so stored water in block cores, damp material and anything porous sitting against the wall all keep contributing after the drainage goes in. Give it a few weeks with a dehumidifier holding the room near 50 percent relative humidity before judging the result.
Does a cove repair have to be disclosed when I sell?
Illinois sellers complete a residential disclosure that asks about known material defects, including water in the basement, and the specific expectations vary by situation. Our position is simple: a documented repair with a transferable warranty is an asset in a sale, not a liability. Keep the paperwork, and take questions about what your disclosure requires to a real estate attorney rather than to a contractor.
Not sure the cove is where it is entering?
Half of the cove calls we take turn out to be something else once the floor is dry and somebody watches a storm properly. The symptom page walks through what cove seepage looks like, how it differs from a floor crack or a wall crack, and what to photograph before you call anyone.
Read the cove joint symptom guide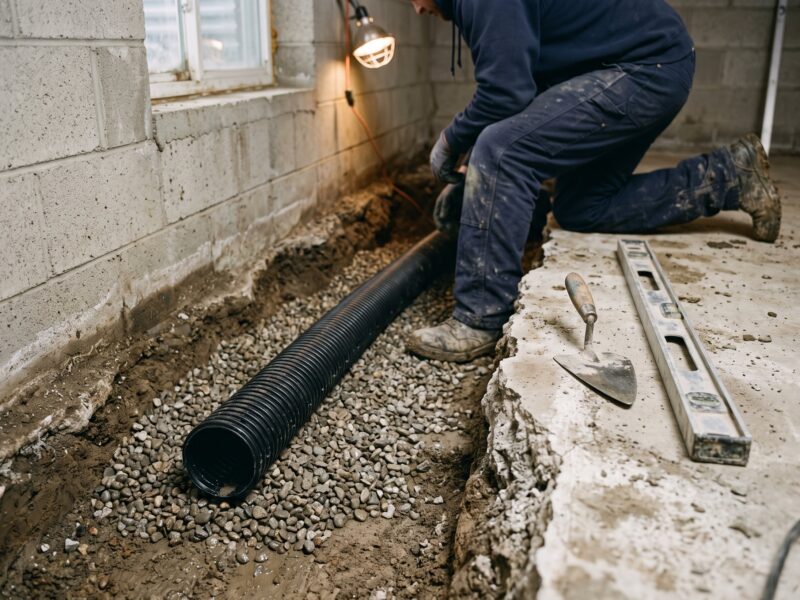

Get the seam diagnosed before you buy another bag of cement
Free written diagnosis within 48 hours, published per-foot pricing, and a lifetime, fully transferable warranty on the system we install.
Or talk to a human right now
(630) 335-1128
Request your free estimate
Tell us what you're seeing. We'll call back fast and be out within 48 hours.